A while back and after years on Windows Media Center I switched to XBMC. More precisely, I installed OpenELEC on my mediacenter PC. It’s a small Linux distribution that does only one thing, but that it does well: Boot insanely fast and launch XBMC.I have since installed it for a colleague or two, and even though using XBMC is very easy, there are a few things to set up first. Most of it is easy stuff, but if you know some things in advance and prepare accordingly, it will go even faster.
Media Structure
First of all, make sure you know where your media is in the network. In my network it’s on two Synology NAS devices:
NAS1
Name: netdisk1
Music: \\netdisk1\music
Movies: \\netdisk1\volume1\movies
TV Shows: \\netdisk1\volume1\series
NAS2
Name: netdisk2
Music: n/a
Movies: \\netdisk2\volume1\movies
TV Shows: \\netdisk2\volume1\series
I currently don’t use XBMC to show my pictures, but you would accordingly put them in a share and add that to the “pictures” section in XBMC later on.
See XBMC’s wiki for movie naming conventions and TV show naming conventions. Following them helps a lot later on when automatically scanning media content.
Installation
First, install OpenELEC on your media center PC. To do that, head over to their download site and grab the latest (stable) “Generic Build”. If you’re having trouble with that, try out the “Generic OSS Build” or one that fits your hardware best (Raspberry PI etc.). If you don’t have a really old system you should also go for the x86_x64 build and avoid “Legacy” builds.
There’s already an installation guide on OpenELEC’s wiki, so I won’t cover the first steps here.
Customization
My guide starts at this picture:
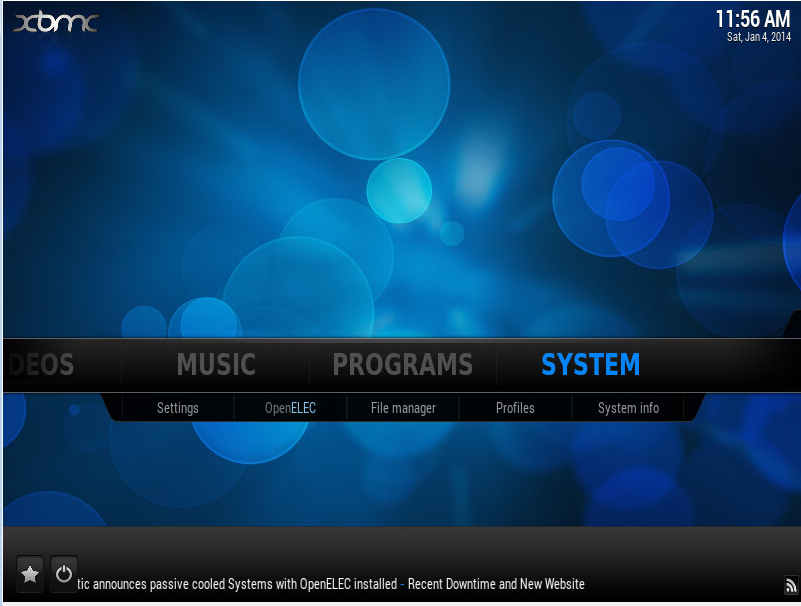
So you’ve installed OpenELEC. Now what? First we’ll see to it that we can download Plugins etc. from their repository. Fresh installs of OpenELEC sometimes aren’t able to do that right away, even though they’re connected to the internet and you can for example download metadata for your movies and TV shows.
Let’s first configure OpenELEC settings. SYSTEM > OpenELEC:
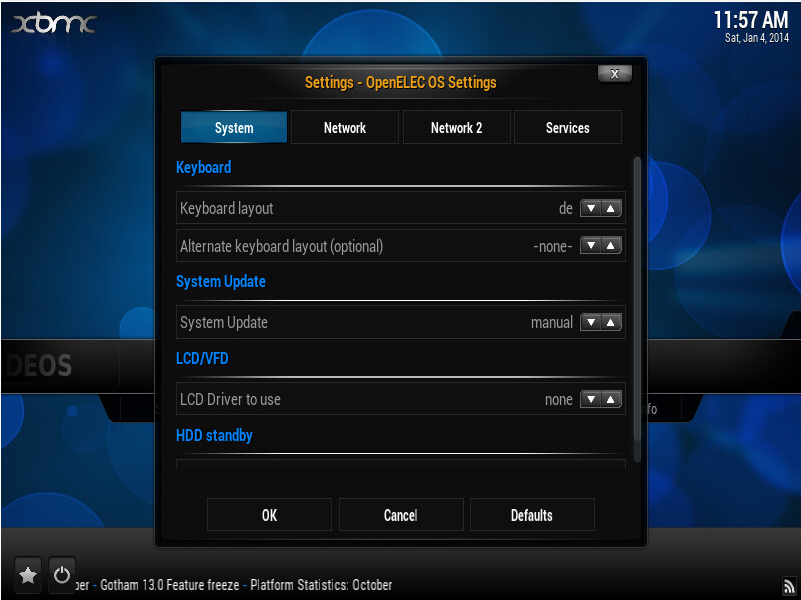
Set the desired keyboard layout, then go to Network:
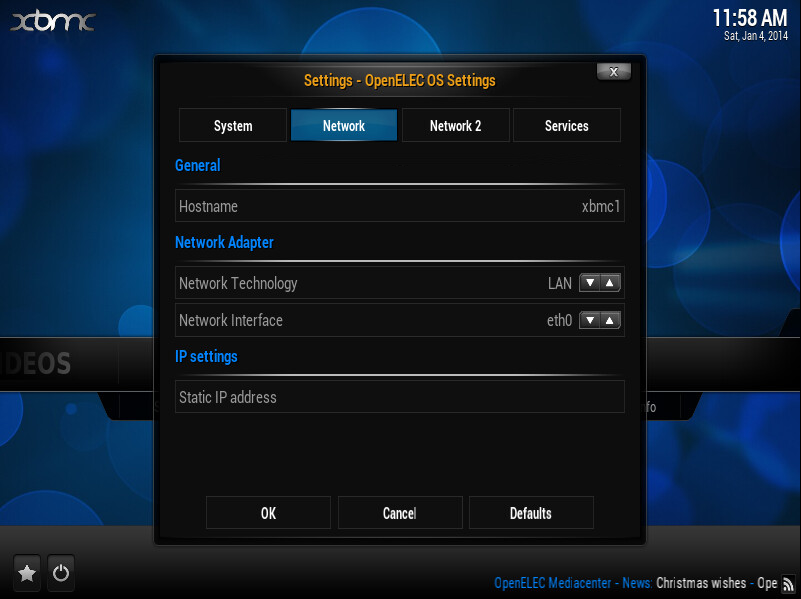
Configure the hostname (or leave it at openelec), then go to Services:
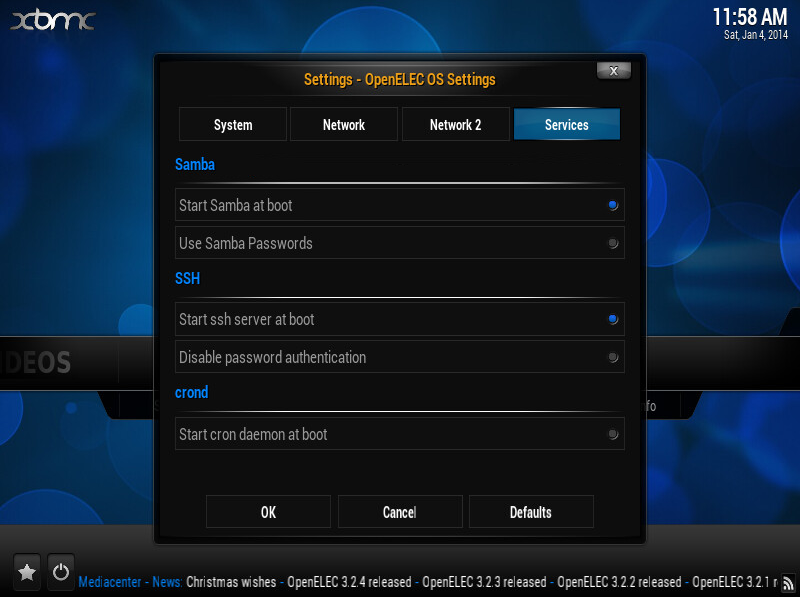
I suggest you activate the built-in SSH server.
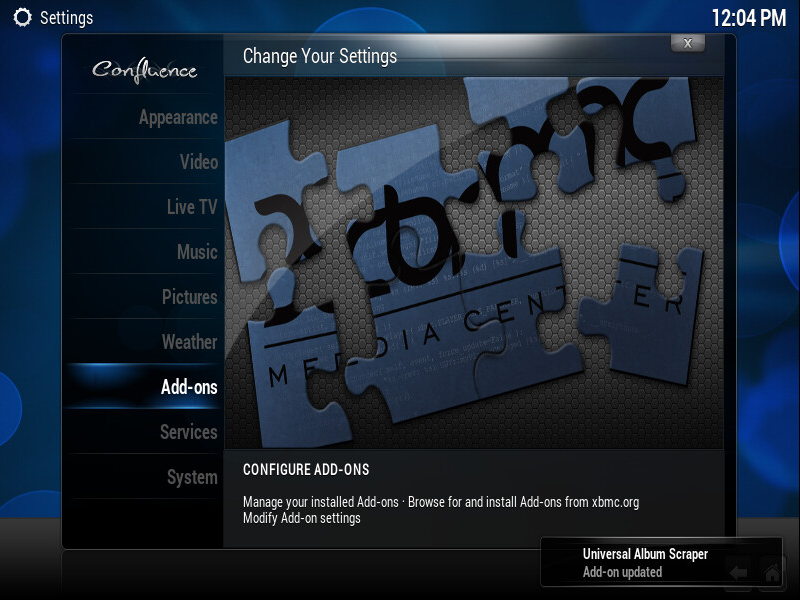
Now let’s help XBMC connect to its repository. Exit OpenELEC Settings with OK, and enter SYSTEM > Settings. Then navigate to Add-ons:
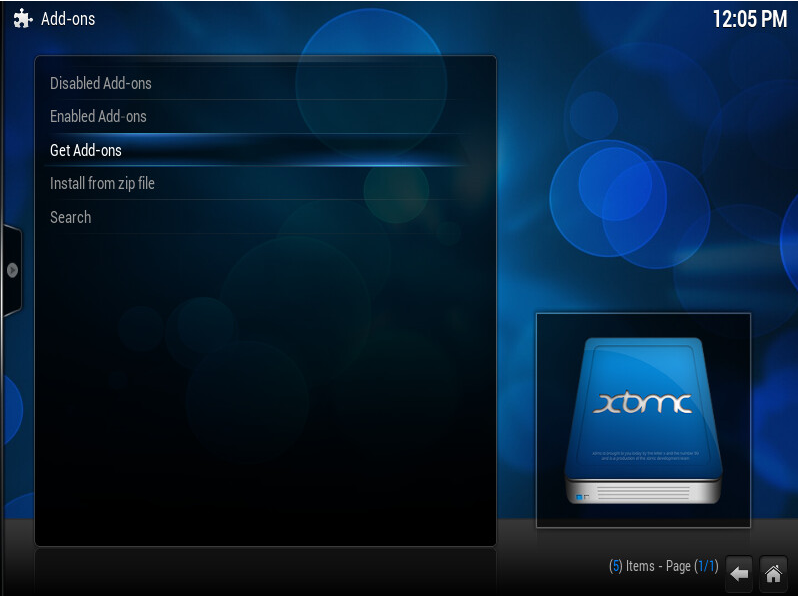
Select “Get Add-ons”:
Now with “OpenELEC Mediacenter OS Add-ons” selected, press the “C” key to get the context menu, and Check for updates.
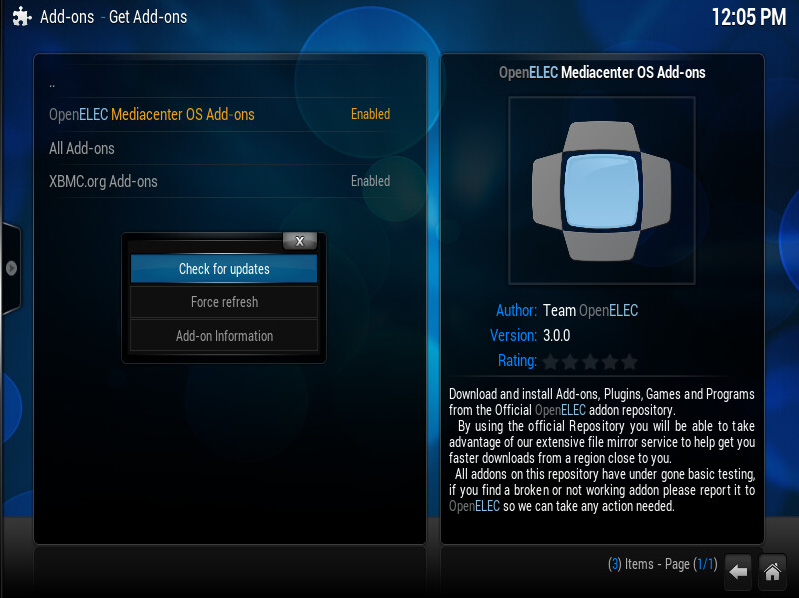
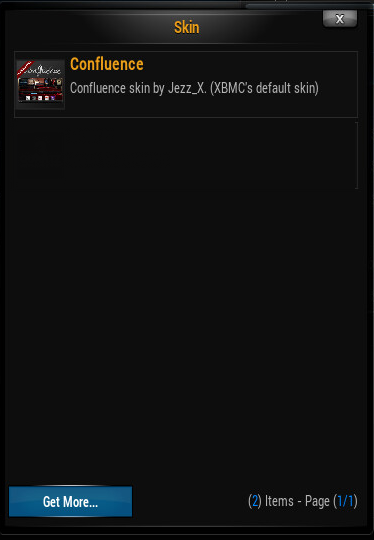
Repeat the same for the “XBMC.org Add-ons”. Now you should be able to receive plugins, skins etc. Let’s first change the skin to something that is simple and will use little to no resources. Navigate back up to “Appearance”, select the preinstalled “Confluence” skin and use “Get More…” to search for an alternative:
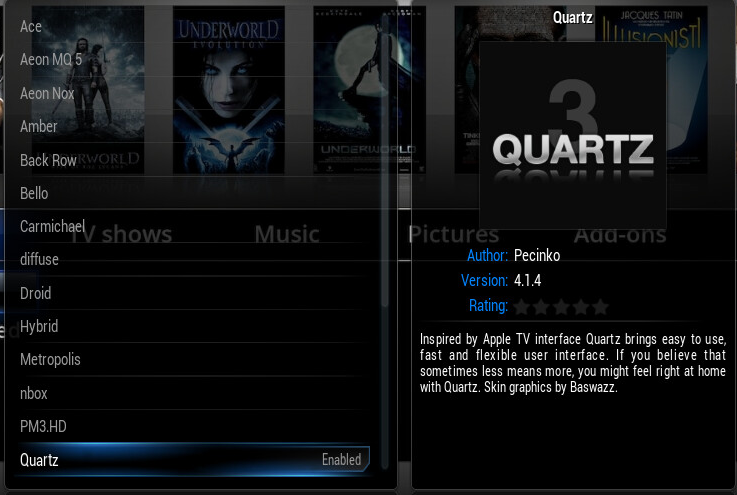
My favorite skin is “Quartz”. It may not have the most eye candy, but it’s simple, fast, easy on the PCs resources and includes everything I need in a skin:
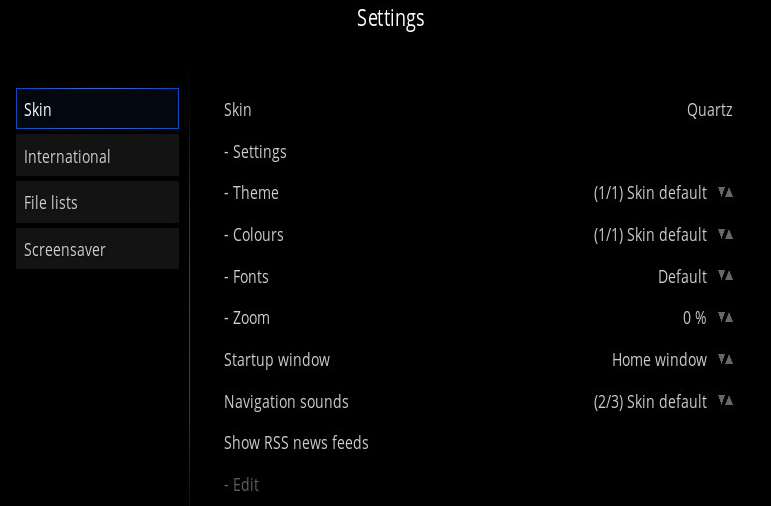
Go ahead and install it, then activate it when you’re finished. Now you should have something like this:
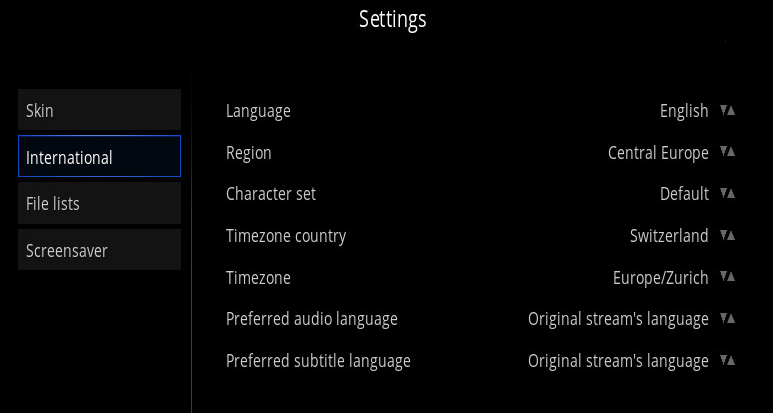
While we’re in here, let’s go to “International” and set some more things:
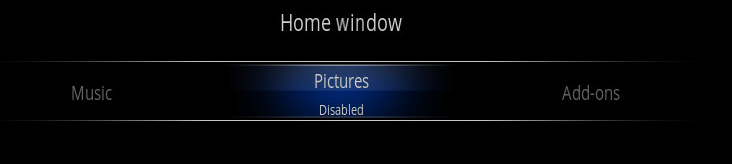
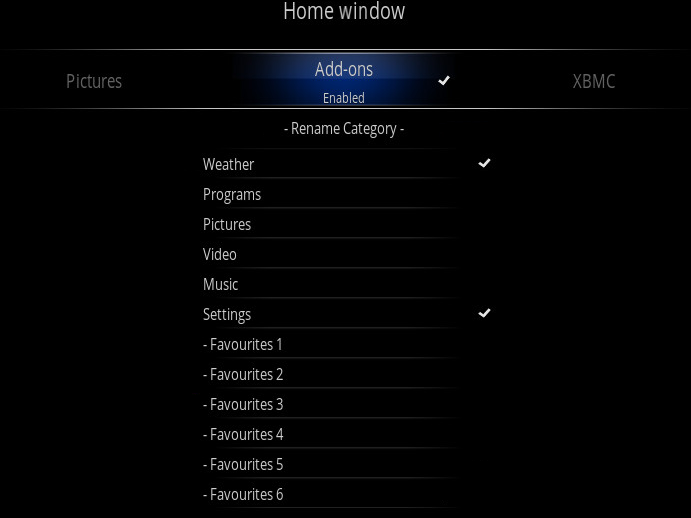
Once done, go back to settings, then select “Skin” and the “Home menus customizer”. We’re going to disable stuff that we don’t need:
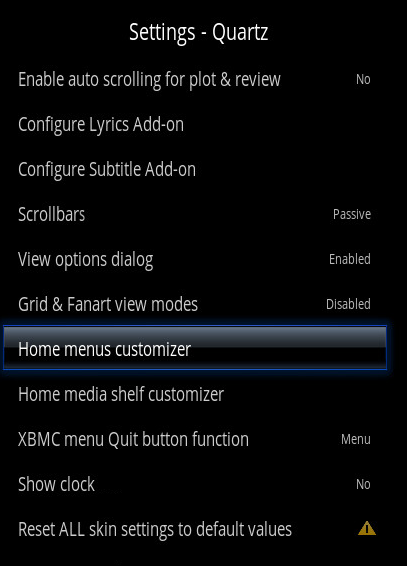
In my setup, I don’t show Pictures. So I’ll disable the whole “Pictures” menu:
You can also disable submenus:
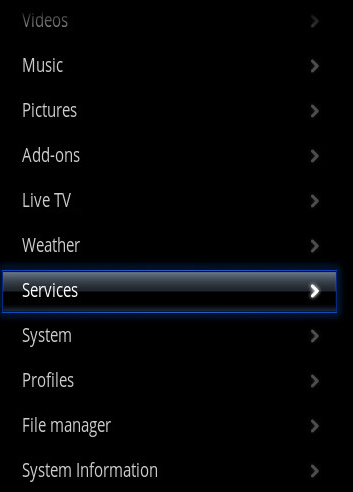
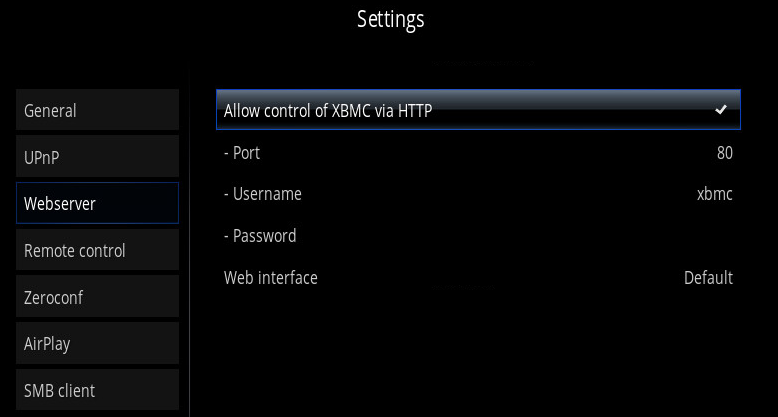
If you’d like to remote control XBMC over the web or using a smart phone or tablet, go to XBMC > Settings > Services:
Once there, select “Webserver” and enable “Allow control of XBMC via HTTP”:
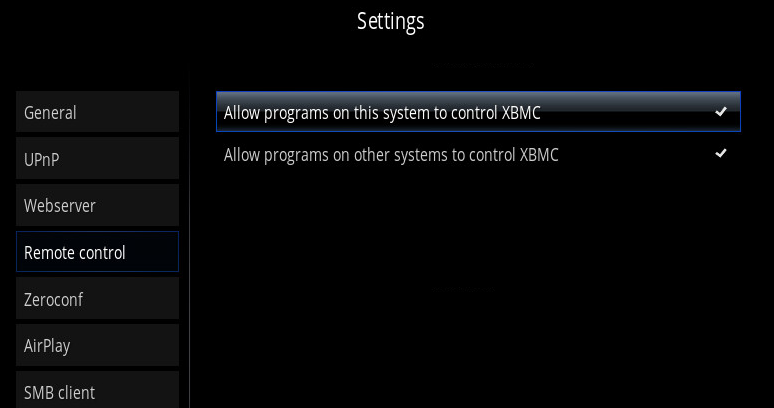
Next, select “Remove control” and make sure both options are activated:
Once done, this is what my XBMC looks like:
Adding Media
Now all that remains is adding media sources like movies, TV shows and pictures. Basically we’ll add one media source per share. Going back to the list of my media, this means that I have three shares with media in my network: \\netdisk1\music, \\netdisk1\volume1 and \\netdisk2\volume1. My movies and TV shows are subfolders under the two “volume1” shares.
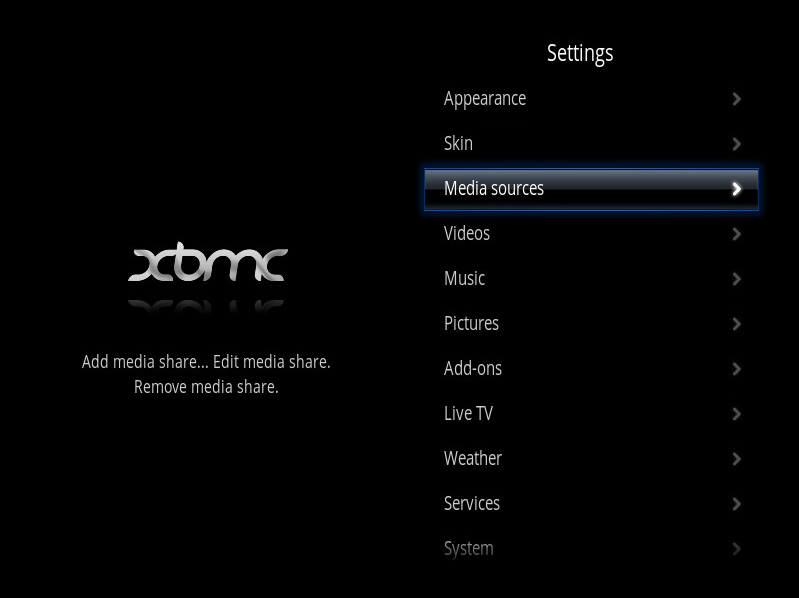
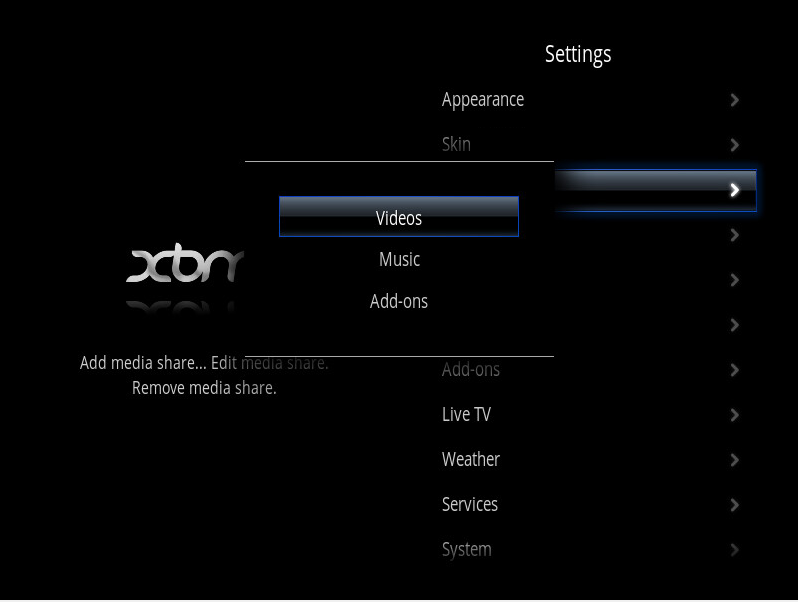
Go to Settings > Media Sources > Videos:
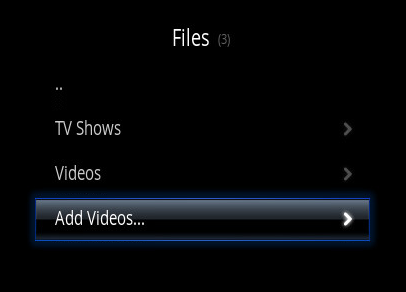
Click “Add Videos…”
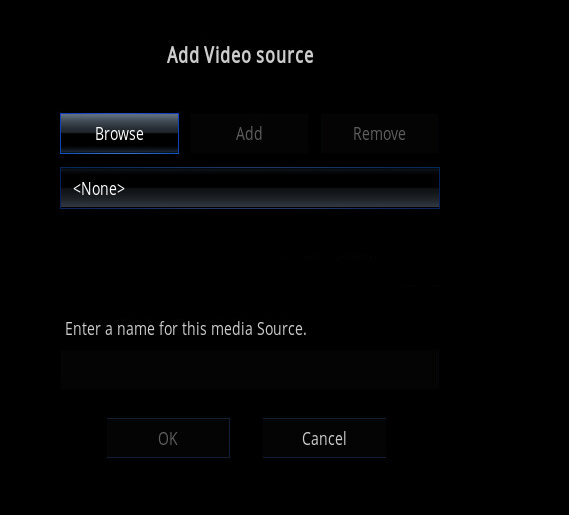
Select “Browse”:
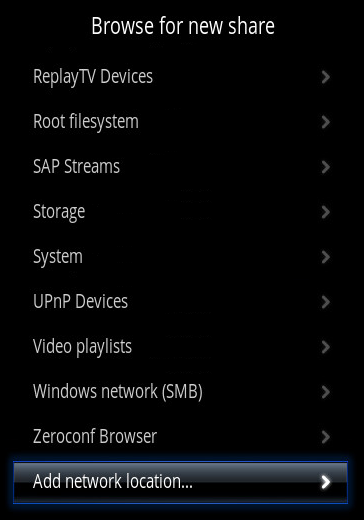
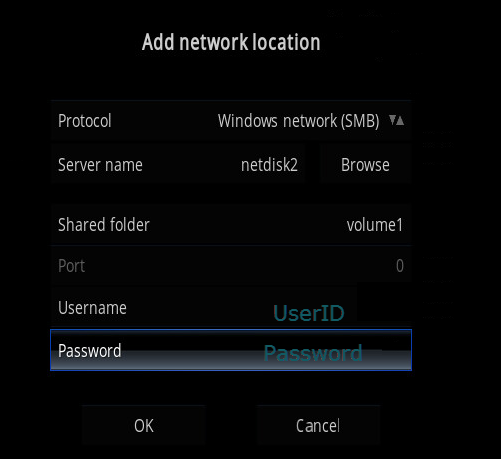
At the bottom of the list, select “Add network location…”
Add all your shares, three in my example:
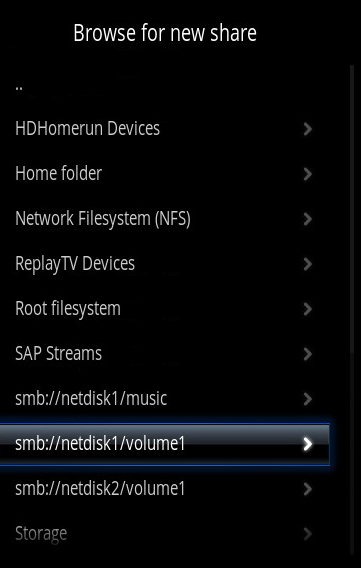
Now add the actual media sources. Same as before, “Add Videos…” > “Browse” now you should see the shares we added before. Select one of the shares:
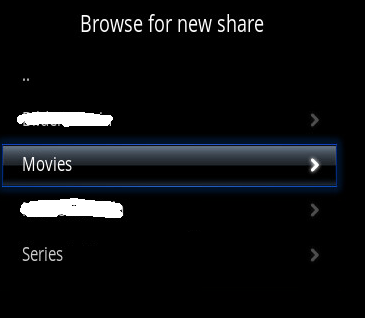
Next, select the “Movies” folder:
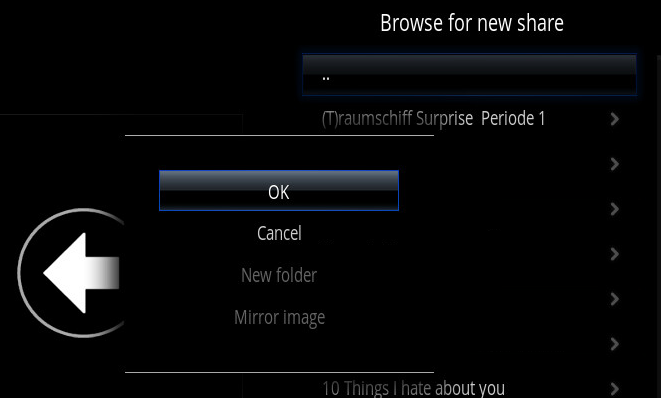
You should now see a list with your movies. Move left to select the folder with OK.
Verify that the path is correct and enter a unique name for the source. Confirm with OK.

Specify what type of content is in this folder and activate “Movies are in separate folders that match the movie title”.
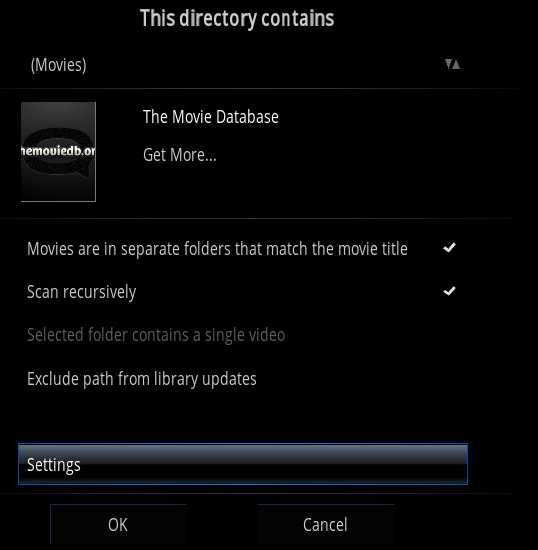
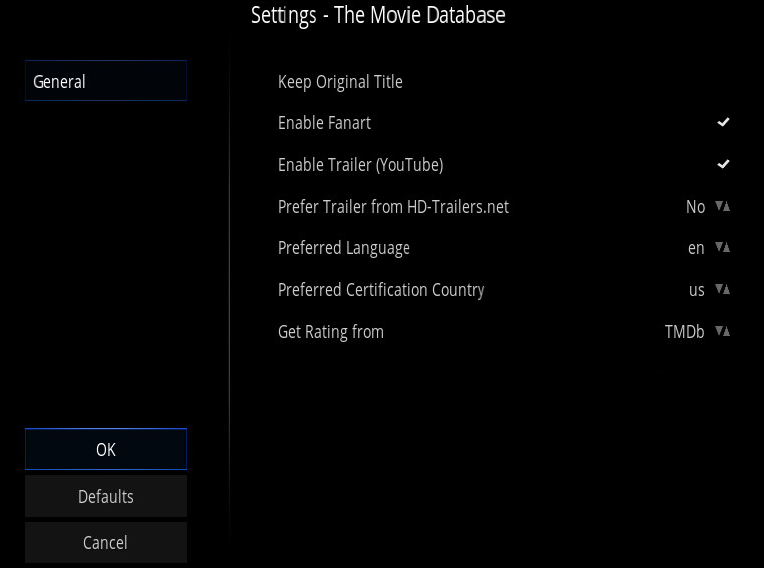
You can change the language of the metadata, preferred rating etc. in settings:
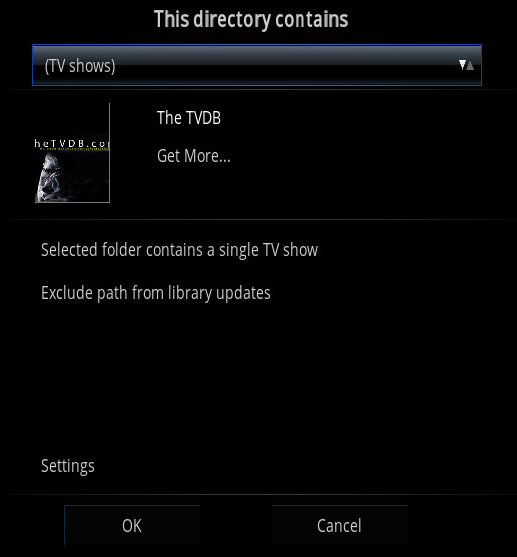
Repeat above steps for all other media sources. If the source contains TV shows, set the content type accordingly:
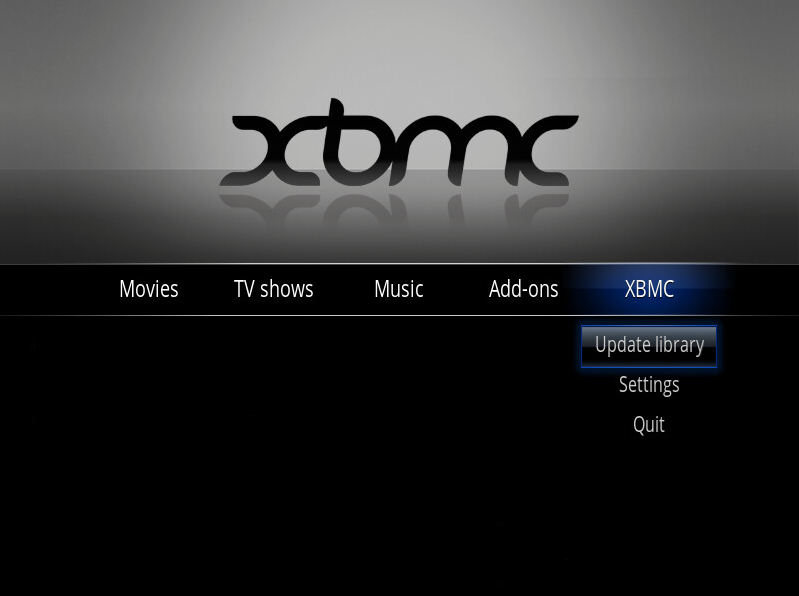
Once you’re done, head back to the main menu and select XBMC > Update Library:
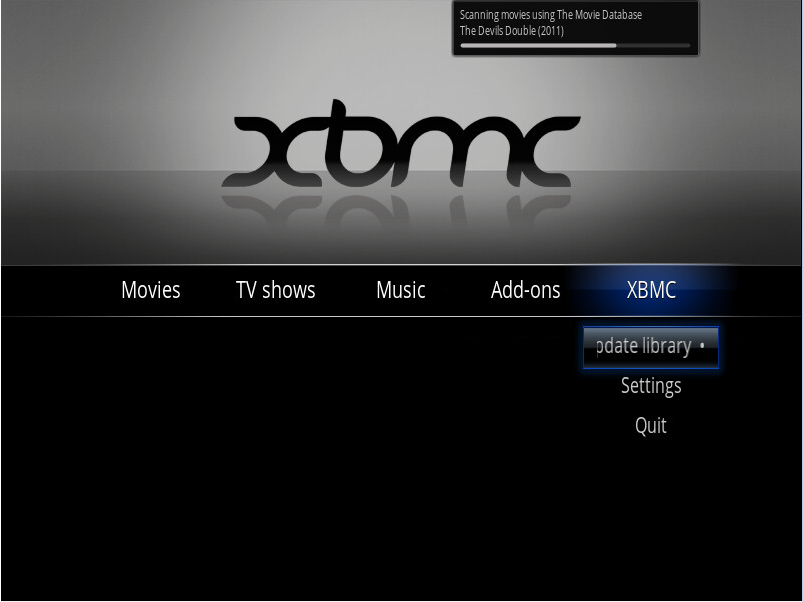
You will notice that XBMC starts looking for content. Give it time, then verify that content is showing in Movies, TV shows and Music.
Both the Movies and TV shows list have different styles. For example, the default view of movies is “List”:
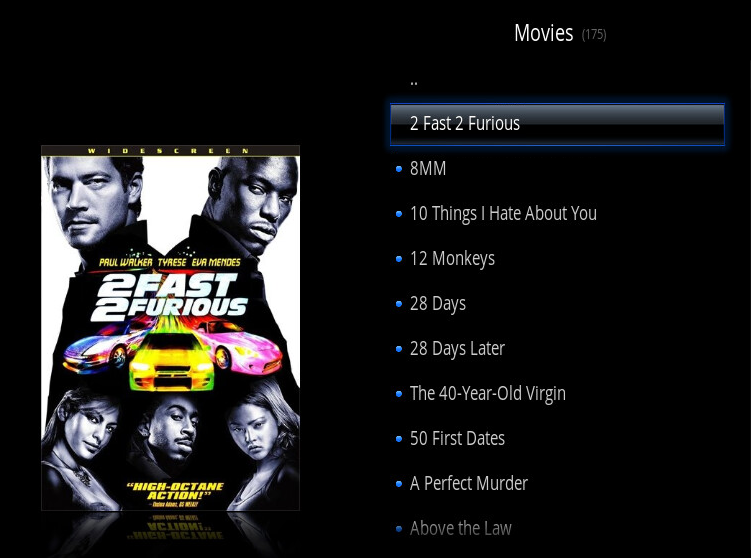
I prefer “Media Info”:
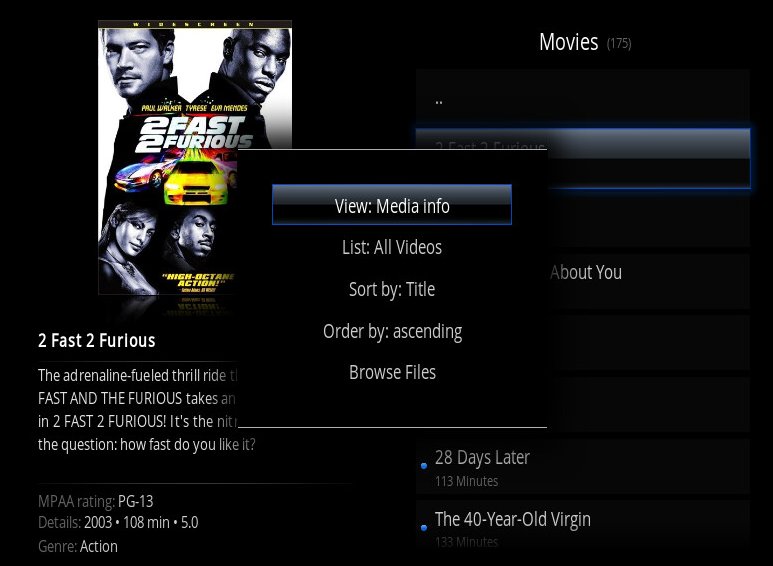
Same with TV shows, where I also use “Media Info”.
So this is it, default configuration of XBMC is all done. There are some things that you need to configure according to your setup, for example video/audio output settings which can be found in XBMC > Settings > System, or weather information (your location) which is in XBMC > Settings > Weather etc.
Custom Tweaks
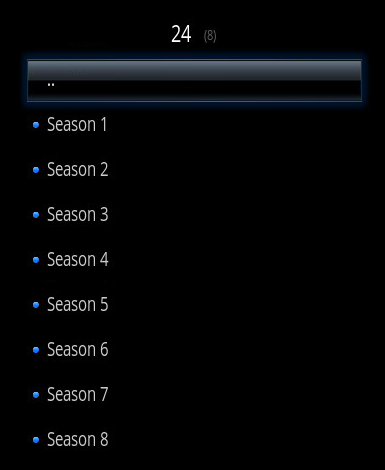
By default, each TV show will have an “*All Seasons” folder, followed by “Season 1”, “Season 2” etc.:
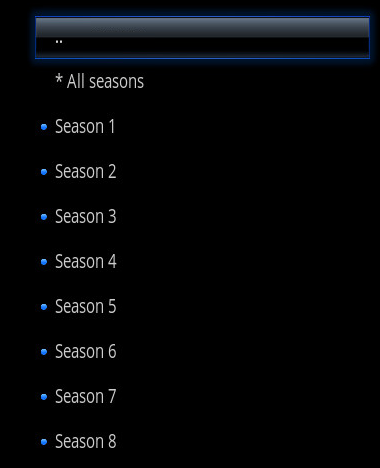
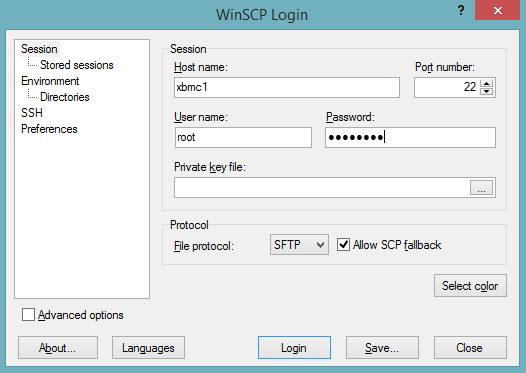
I don’t really see the point of this, but getting rid of it isn’t possible in the GUI. Using WinSCP, connect to your device using default settings. The password is “openelec”, if you didn’t change it:
Once connected, navigate to /storage/.xbmc/userdata. Create a file “advancedsettings.xml” with the following content:
<advancedsettings>
<videolibrary>
<hideallitems>true</hideallitems>
</videolibrary>
<musiclibrary>
<hideallitems>true</hideallitems>
</musiclibrary>
</advancedsettings>
This should get rid of the folder. You’ll probably have to restart, though. Go on, it’s only a few seconds… then you should see this when you enter an episode:
Recommended Add-Ons
There are tons of Add-Ons out there. It’s probably best to keep the number of Add-Ons on your system to a minimum to have a stable system. And just to make sure, don’t install untested Add-Ons all at once; instead install one, test it and if the system is still stable, install the next and so on. The Add-On Manager can be found in XBMC > Settings > Add-ons.
| Add-On Category | Add-On Name | What it does |
| Web interface | AWXi | An excellent web interface for XBMC, in my opinion superior to the built-in interface. |
| Program | XBMC Backup | I know, backups are for cowards. Still, you should probably use this. It can create backups automatically on a schedule, you can manually trigger a backup before bigger changes, etc. |
| Program | XBMC Library Auto Update | Use this to update your library automatically on a schedule. You can also update the library manually as described above of course, or remotely using PowerShell as described here. |
Recommended Remote Apps
| System | Remote App |
| Any PC/Mac with a browser | Remote web interface, just point your browser to http://xbmc1 (or whatever you named it) |
| Windows 8 | XBMC Remote, Wiki and Windows Store link |
| Windows Phone 8 | XBMC REMOTE. There are various apps with the same name, make sure you get this one: Link in US store, link in Swiss store. |
| iPhone/iPad | Official XBMC Remote, Wiki and App Store link |
Of course you can also use a good old infrared remote or a keyboard attached to the media center. Check out here for more information about the various options. The easiest, out-of-the-box solution is using a MCE (Microsoft Windows Media Center) infrared remote.
Conclusion
This is it for the moment. You should now be up and running. See also my previous post about using PowerShell to remotely do stuff (refresh media) on your new media center. One of my next articles will cover synchronizing all your XBMCs in your house using a central database. This will let you start watching a movie on one media center and finish watching it on another XBMC, picking up exactly where you stopped playback on the first media center. I’ve also just ordered a Raspberry PI mini PC and will see how well that does with XBMC on it. So go on now, watch a few movies and TV shows and stay tuned for the next episode on here… J
Thank you for the custom tweak! This makes my XBMC just that little bit more sleak.
Greetings from the lowlands
Nice tutorial, thanks. I’m just putting together my first OpenELEC system and it’s the first time I’ve touched XBMC since it was on the original Xbox.